Friday, April 18, 2014

Macros and Invasives in the Hudson Valley

Invasives
To introduce invasive species, I had a ton of fantastic images of invasive commonly found in this area and the Hudson, which I projected on the board. Some I collected on my own, other were great diagrams from the Cary Institute.
I also had my string of water chestnuts for the kids to see and touch. Since there is a beach on the river nearby, many were able to identify these as cowheads or the pointy things that hurt! 

Macroinvertebrates 
I collected a bunch of macros from the Esopus Creek. Really didn't find too much, a ton of scuds and a few snails and a water beetle. Plus some spiders, green algae, muck, and plants from near the water.

I set up petri dishes and several MacroLens and the kids had a field day looking at them. Putting down a white cloth on the table helps see them better. I also had ID books and other stream ecology visuals for them to look at.We took a look at some of the organisms under the microscope as well!


History of the Hudson


The Hudson River has been a very important part of history in the Hudson Valley and NYS!

Human impacts to the HR over time

I slightly modified an activity I used to run at the Hudson River Park Trust. It is an interactive story that teaches the differences and similarities in the Hudson River between the 1950's and present day. This game should be modified based on age group.. at HRPT we did different versions based on knowledge level, ability to read, etc. Essentially you tell the story of the Hudson being polluted and trashed due to factories, over fishing, and the general public. People like politicians and scientists tried to help but it wasn't enough. Today regulations are in place for releasing waste and chemicals, fishing limits, and people are more conscious of properly throwing away their trash. I assisgn kids a role, like the fisherman or scientist. During the story they are responsible for placing or removing "trash" "pollution" or "fish" from the river. At HRPT we used felt for the river, plastic bottles, and green felt for pollution. I used a vinyl blue material this time and construction paper cut outs for pollution. For fish I use the fish specifically found in the Hudson and laminated them with the name on the back. This also gave kids the chance to learn the fish names... this entertained some for days!

Hudson Geography
I threw an activity together, inspired by a similar activity from DEC. Kids started with a blank map of NYS. Together (with the help of some bigger maps) we determined where the Hudson River is, where it starts, where it ends, what other important features border the river or the river passes through. We identified where we live and where certain fish live (salt vs fresh water).


Discover the Hudson River Activity Books
I love these activity books from Project WET so much! Great for self-guided learning or to do as a group. My kids particularly liked the page where you record which fish and plants are found in just salt water, just fresh, or brackish.

Responsibility and Recycling

We had a field trip to the local recycling facility planned for the end of the week, so during rock week we also took some time to think about our individual responsibility to protect earth's resources and keep our neighborhood clean. We did a clean-up around our building, then walked to the nearby playground to also clean up some trash. Everyone was super energetic and motivated to collect as much trash as possible. We found some pretty crazy things! Like nail polish, a hammer, and many balls.. some good enough to keep! I was really proud of the hard work my kids all put into the clean-up that day.


On Friday, we got a great tour of the recycling facility. The weather wasn't too great and behavior wasn't at its best either, but we trekked through. 


We learned that our plastic, glass and metal get separated on site


We got a close up of the assembly line at work

 We even spotted the large magnets pulling out the metal items
Our town is unique and "ahead of the game" because we are single stream, the rest of the county is not.
 All our recycling gets placed into a pile here temporarily and is brought elsewhere to be sorted with a larger single-stream sorter.

Compost is made and sold on site!


Makes you think twice about the waste we consume.


Tuesday, April 8, 2014

Earth's Rocks & Resources

For a theme on rocks and other natural resources I focused on

  • Minerals vs Rocks
  • What is earth made of?
  • What things are naturally found in or on earth?

We used the one of my flip-chart activity books that I love so much, this one was

All About Earth.


We examined different properties of minerals- some are chalky, magnetic, cubic, thin and sheet-like,make colored streaks, easily scratch glass... We discovered certain minerals that make up commonly used items like pencil lead.

We read books to identify minerals and rocks by name. We also read stories to teach about the 3 different types of rocks: sedimentary, igneous, and metamorphic.


Then we played a game where I had the kids try to sort a set of rocks into the 3 categories.

We did a simple test for limestone in our rocks by dripping some vinegar. A rock should fizz in the presence of limestone. KIDS COLORED SIDEWALK CHALK, like Crayola, turns out to not be made from limestone... so it doesn't work on those.

Rock Cycle Songs:
We Will Rock You
3 Types of Rocks (London's Bridge)
Rock Cycle Song (Row, Row Row Your Boat)


Towards the end of the week we talk about what natural resources are. I created an activity sheet to help sort renewable, nonrenewable, and man made resources. Kids had to cut and glue the images in the right boxes. We talked about what all these words mean and how many man-made resources are built ( in part) from resources on earth (like wood from trees to make a house).


We recently received this amazing 3D landscape model. It features 7 difference major landscapes/ geological features such as canyon, glacier, valley, volcanic island, etc. On each piece all the features on the landscape are numbered. There is a book where the kids could look up the numbers to learn the names and definitions of these features (i.e.- fjord, kettle lake, peninsula..) The sides also give you a soil profile of the layers commonly found underground in each area. Some show fault lines or intrusions and help tie in where sedimentary, igneous, and metamorphic rocks are most commonly found.

Monday, April 7, 2014

Testing pH (using household items)

I was FLOORED to discover how easy it is to make your own "safe" pH indicator.

Red cabbage juice has a pH of 7, changes to shades of reds with the addition of an acid and shades of green and yellow when adding a base. It remains blue and purplish closer to neutral (7).

Shred or even pick out from a salad mix bag shredded red cabbage. I used only one cup of red cabbage to get nearly a jar full of juice. I've read different variations for the water to cabbage ratio, but I did 1:1 and that worked very well.

The steps are simple:

1. Pour one cup boiling hot water over 1 cup red cabbage.
2. Let sit for at least 15 minutes or until it doesn't look like the juice is getting darker.
3. Strain the cabbage out using a pasta strainer.
4. Repeat if it looks like your cabbage still has a lot of purple pigments or you want additional juice. I poured a second cup of water over my cabbage & drained. I think I may have been able to do a third round as well, but I really didn't need any more juice.

I tested the whole experiment at home to make sure the color changes actually worked and to just experiment with the results of different products in the home. I ended up going with the following acids and bases which produce these colors pictured below. In order from left to right:

          • Hot sauce
          • Vinegar
          • Milk
          • None/Control/Red Cabbage Juice
          • Baking Soda
          • Detergent
          • Bleach


I created a worksheet for kids to record their experiment results. We started by coloring the key at the bottom and discussing what is the pH scale, acids, and bases. I had kids try to predict whether they thought certain things were acids or bases or what color they might change. I explained that the cabbage juice alone has a neutral pH, which is why we can use it as an indicator.

Cool trick for older kids- after you do all your tests, experiment mixing two solutions. If you are to mix a strong base and a strong acid, the two should cancel each other out and return to neutral (purple)! Math can easily be incorporated into this.

When we began, everyone had their own beaker cup and chance to do each test.... towards the end we ran out of time, so we did the last two as a group.. Having multiple jars of the indicator and acid/bases would have helped as I had to walk around with the jar to all the tables.


Sunday, April 6, 2014

BOATS, BOATS, BOATS

We learned about the physics of sailing with a fun boat building activity.

This is a very simple activity that can be modified easily to a short or long timeframe. I first learned it while a volunteer educator on the Hudson River Cleawater Sloop.

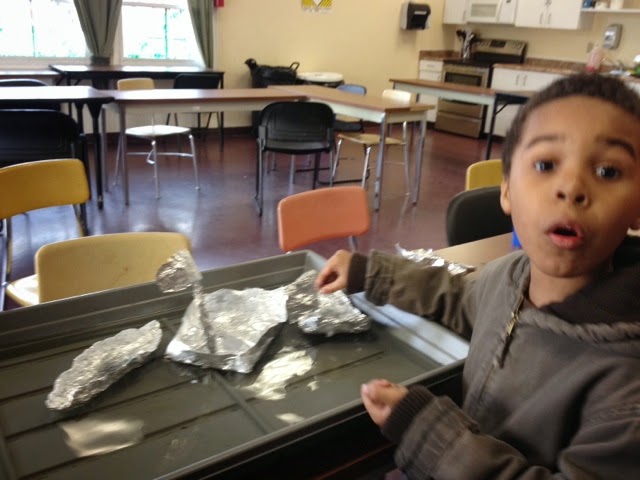
Provide each kid (or team) a small amount of aluminum foil and tape. Allow them to use creativity and critical thinking to design a boat that will not only float but hold the most weight. 
Some boats we discussed or that kids created included:
  • Canoe
  • Speed boat
  • Sail boat
  • Barge or large surface area boats

After snack, we had a floating competition.  I split the kids into several heats/rounds of 4 kids each, since there wouldn't be enough room for all to go at once.
We used paper clips as weights. I recommended something heavier like pennies. Make sure whatever item you have, to have A LOT. The boats will hold more than you think.

The number of paperclips we had ended up a limiting factor for the most resilent boats: the barges!


Friday, April 4, 2014

Bioluminescence

To understand bioluminescne we started by watching a slideshow of living things that exhibit bioluminescence (produce their own light or glow)


We have a TV for Wii days and I realized I can insert a flash drive to show media, which is awesome and I definitely plan to use this more in the future.


I introduced the kids to bioluminescent animals and why certain ones have this feature:
  1. Defense- scare predators 
  2. Visiablilty- help see in dark habitats
  3. Just for show- humans have found ways to insert bioluminescent genes into common household animals such as fish 

With crayons and black construction paper, we drew some common biolumincent animals.
  • Firefly
  • Jellyfish
  • Anglerfish
  • Mushrooms
  • Other insects
  • Glofish

After snack we made our own glow animal/plant shapes! We followed the lab producure from a book we had called smart labs. The main ingrediants are corn starch, water, baking powder, and a glow powder that came with the lab set. You end up creating something that is similar to the consistency of dough. We used cookie cutters to make shapes, I tried to give them options of cutters most closely related to bioluminescent or glowing things( butterfly, fish, star, moon, plant)

It takes about a day to dry... Flipping them over half way would have been beniftial. Also don't leave them under direct light excessively because I think that's what caused most of ours to crack. 
The good news was, they DID glow but not great. It seems the atoms need to be heated up by shinning a flashlight directly on it... This helped them glow better. I noticed that my iPhone light worked best (high LED light?). A regular desk light wouldn't do the trick. Also you need to I somewhere complelty dark, like a closest or somewhere wth absolutely no windows.

We had a tiny amount left over, which I made into a mushroom and tested the glowing success of later at home.