

Key talking points:
- why are more animals an vegetation found in the upper most zones?
- what happens to temperature, light and pressure as we move deeper into the ocean?
- what special features to animals living in the midnight zone and abyss have?
- why are coral reefs found in higher zones? (also can discuss the continental shelf)
- why might some animals occasionally move to higher or lower zones? (food)

We reinforced this activity by reading the Disney story, FINDING NEMO! The characters actually travel the many different ocean zones during the movie/story.
Great Barrier Reef- very beginning
Open Ocean- Marlin races after the boat that has Nemo
Twlight/middle zones- meeting the sharks
Abyss- following the mask and getting chased by fish
Trenches- encountering the jellifish
East Australian Current- traveling with the turtles
Harbor- scooped up by the gull
I also just found this awesome Finding Nemo Educator's Guide after the fact. You could probably make a whole week of Nemo themed activities from it...
Parts of a Fish
The fish skeleton and dissection models were definitely a BIG HIT!

Some kids (especially the boys) spent the entire time looking at these things. The plastic fish model has a couple pieces like the gills, liver, and a few other things are magnetic piece which can be pulled out to see what is underneath or behind. Both models have numbers on all the organs and body parts and kids spent a long time not only identifying the numbered parts but comparing the difference between the "real" fish and the plastic fish parts.

The girls were a little less interested, but were happy to do a fish craft. My emphasis for the day was mostly on understanding at least the basic features and their importance: gills, fins, tail, mouth, eyes, scales. Our craft using old CDs helped them identify all these parts.

A Day at the Beach

To learn about the features and life at the beach we did a few activities, and I had a lot of show and tell items like a starfish; tons of shells including clam, oyster, and snail; blue crab carapace; horseshoe crab carapace; sand dollar; coral.
We made shells prints, or fossils, using Crayola model magic. This is a very simple activity and using model magic was so much easier and less messy than the plaster of paris we used to make animal tracks!

After snack, we did a messier project- crab handprints. I put a little bit of sand in a pan and instructed kids to put glue on the bottom of their pages first (use glue stick), they then drizzled sand and shook off excess, all in the pan. Next they painted their hands, some need help painting the second hand. Also unless you really direct their hands, they might not spread them out wide enough. Even so they all came out looking GREAT!
.JPG)
.jpg)
Ocean Songs
It is so simple to search the internet and find fish and ocean songs. Here's two I love:
The first is a song about Horseshoe Crabs as a part of a conservation initiative called Flip Em Over
The one below is about crabs and was made by someone at the Padilla Bay National Estuarine Research Reserve. I had the pleasure of meeting this awesome guy at a NERRS annual meeting and hearing the song is person!
How are our Oceans Doing?
Oils Spills and Other Threats
To end the week, we did some true environmental education. We talked about different ways humans impact our oceans- oil spills, pollution, overfishing/bycatch, climate change and ocean acidification.
We did an experiment to explore how difficult it is and the option for cleaning up oil spills. I set up 3 aluminum pans with water. To represent crude oil I used a mix of vegetable oil (any cooking oil should do) and mixed with a bit of coca powder to give it the brown oily color. We put a bit of oil in each pan. I provide 3 options for cleaning the spill (hence 3 pans)
- Dispersant- spray bottle with dishwashing soap/water mixture. Dispersants are chemical sprays used, usually overhead by planes. If done properly (sprayed several times in the same spot), you should see the dispersant breaking up the oil. After a while you'll notice this tray gets lighter in color because the soap is mixing up the stuff.
- Hard Boom and Skimmer- Use a couple straws (bend and put inside each other) to simulate a hard boom often dragged by a large boat. Gently place the "boom" at the surface of the water and slowly pull it towards you, the oil should be trapped and pulled along with you.
- Absorbent Boom (soft boom)- I was going to use something like cotton balls, but forgot them. I think paper towels worked better than cotton balls anyways. Roll up the towels. You can have them use the same pulling method as previously but explain that this also absorbs to oil too. Or discuss how these are placed at the shore in anticipation of oil being pushed by waves.
My TEENS participated which made me super happy! They are more critical than kids however, so they felt like none of these techniques were working. Which is okay if the project fails, or didn't work as well as I had hoped.. it just goes to show how incredibly hard it is to clean up oil spills!


Part 2 was discovering how animals covered in oil are saved and cleaned. I had 3 options set up: cold watet, hot water, and soapy water (dishwashing soap). Students dipped a feather in oil and then tested the 3 options in order. Obviously, the soap should work best... it didn't really do a decent job in my opinion. Some of the younger kids were all excited saying they saw a difference... There's a couple reasons why it may not have worked as well as I expected... ratio of soap/water, types of feathers used (all were real), needed more time to soak.
There are tons of similar oil spill experiments online.. took some of my concepts from this set of 3 videos: Oil Spill Experiments (by Kidsgetaplan)
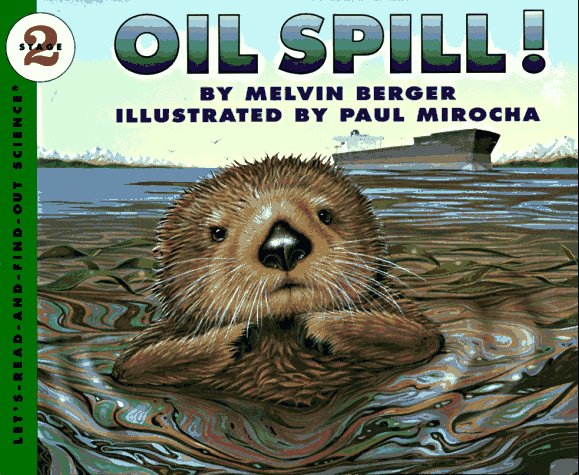
With many of the young kids we first sat down and read the book Oil Spill! by Melvin Berger. It helped introduce the issue of oil spills- how they occur, who they impact, and how we can clean and prevent them. Then we tackled the experiment, and I often referred back to parts of the story.
I also had some good photo visuals of oil spill clean-up tools, oil covered animals, and other ocean environmental issue visuals... these were more appropriate for older kids.
No comments:
Post a Comment